How I build out cutscenes
📆 Created on January 25, 2022.Alright been a while since I posted anything in here. I'm finally out of my large testing refactor and am going back to adding actual content to the game.
For the past week or so I've been working on dialogue and cutscenes, you've seen one of those in here already, the elevator assault gif I posted before.
Today I thought I'd share a bit about how those scenes are handled in the game. All the dialogue and cutscenes are handled by YarnSpinner, a dialogue scripting language made by the same folks who built Night in the Woods.
I chose YarnSpinner because the project is super light weight and incredibly easy to extend and customize. I've made a few contributions back to the project and I've been able to make quite a few extensive modification to the version in Electric Noir, but I'll come back to that.
Here's a basic yarn dialogue script as an example:
title: Start
---
Companion: Hi {$playerName}! What do you feel like doing today?

-> I want to go swimming.
    << set $activity to "swimming" >>
    Companion: Okay, let's go swimming.
    [[Done]]
-> I'd prefer to go hiking.
    << set $activity to "hiking" >>
    Companion: Cool, we'll go hiking then.
    [[Done]]
===
title: Done
---
Player: Sounds good! Can't wait to go {$activity}!
===
Again, this is really basic, but it shows off pretty much everything about YarnSpinner.
YarnSpinner operates off of nodes. Each node has a header that can contain metadata about the node like the title, tags and position of the node if you're using the visual editor. Only the title is required.
Each node is wrapped with --- and ===. Within a node, lines can either be commands << do something >> or dialogue Fred: Hey there!.
Commands are where YarnSpinner really shines. Commands can be blocking or asynchronous and you can add custom commands at runtime too:
dialogueRunner.AddCommand("animate", (string args, Action onComplete) => {
    // ... your custom code here
})
You can invoke this later in a script using the commmand syntax: << animate my args to pass >>.
YarnSpinner also has support for variables: strings, numbers, booleans and any variable can be interpolated into a dialogue line with the {$variable} syntax. Variables can also be used in basic if/else if conditional blocks, so YarnSpinner really delivers a lot of power out of the box.
After market parts
Let's talk about some of the modifications I've made to YarnSpinner to make it my default scripting system for the game.
Actors, hit your marks
During a cutscene, it helps if you can easily animate and move characters around within a scene. When filming actors will call this hitting their "marks". Basically, where you need to position yourself within a scene so the cameras capture what the director wants. Electric Noir has the same concept.
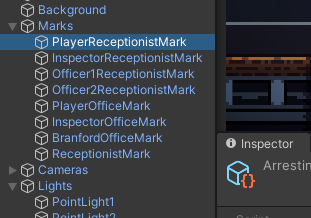
Marks are just named game objects positioned throughout a level that can be referenced during a yarn script to decouple the actors movement from a fixed set of coordinates in the game world. This lets me update a level without having to update every yarn script that uses that level to make sure the character positions are correct.

Acting!
Actors are a key component of the system, you can't have acting without actors afterall. Each actor in the game (anyone who delivers a line of dialogue or needs to perform an action during a cutscene) is represented by a DialogueActor ScriptableObject.
public class DialogueActor : ScriptableObject {
    public string DisplayName;
    public string GameObjectName;
    public List<string> SecondaryGameObjectNames;

    [Header("Rendering")]
    [SortingLayer]
    public int SortingLayer;
    public int SortOrder;
    public Vector2 SpeechBubbleOffset;
    public Color Color;

    public List<ActorPortrait> Portraits;

    public List<Texture2D> Palettes;

    [Header("Audio")]
    public SoundEffect VocalizationLow;
    public SoundEffect VocalizationMid;
    public SoundEffect VocalizationHigh;

    [Header("Animation")]
    public SpriteAnimation IdleAnimation;
    public SpriteAnimation WalkAnimation;
    public SpriteAnimation RunAnimation;

    public List<KeyedAnimation> OtherAnimations;
}
This structure holds all the information about a given actor from the name to show during conversations to their various animations that can be used during a scene.
Adding an actor to a scene is done using a custom actor command: << actor Actors/Branford BranfordOfficeMark >>.
When run, this will lookup the actor data for the "Branford" character and instantiate an actor object at the "BranfordOfficeMark" mark in the current scene. By default, the actor command will play the IdleAnimation from the actors settings, if one exists.
Motion is emotion
Moving an actor to a mark is equally easy: << move_to_mark Actors/Branford NewMarkName 4 >>. This will move the Branford actor to the "NewMarkName" mark over 4 seconds. Depending on how far "NewMarkName" is from the actors current position, and which value is available, they will play either the WalkAnimation or the RunAnimation during the move.
When designing Electric Noir I knew I wanted to have characters that could emote more than a 32x32 pixel character would allow. Each actor can have a set of portraits assigned to them that can be shown during the execution of dialogue lines.
@Beck(happy): Oh, hey you. You're up! Well, I'm done in the shower if you're ready.

-> (happy) Yeah, sure. I'll hop in.
	[[ testYarnScript_Coffee ]]
-> (sad) Nah I think I'll skip it today.
	@Beck(sad): Everything ok babe?
		-> Sure, yeah. Just a bad dream.
			Was it just the dream that was bothering me though?
			[[ testYarnScript_Coffee ]]
		-> (sad) Everything is fine... I think I just need some coffee.
			Maybe some caffeine would help lift me up...
			[[ testYarnScript_Coffee ]]
Here we see a conversation between Beck and the player with both having lines tagged with portrait names to show during that line (happy), (sad). Portrait names can be anything and by default the neutral portrait is shown. This lets the player identify more with how characters might be feeling as well as how their responses might be interpreted.
Wrapping up
There are a ton more features that I've added to YarnSpinner like includes, node inlining, preprocessors, the list goes on! If folks are interested I might do another post showing more of these customizations off.
Hope you enjoyed this dive into how cutscenes are crafted in Electric Noir, until next time! You can always shoot me your thoughts on twitter.