Pixel Art Emission Maps
📆 Created on June 5, 2022.I was sharing some of the work I've done on my artwork pipeline and I realized it would be a good bit of work to share here.
Actually before reading this, if you haven't already, check out my other posts on how my art pipeline enables features like Palette Swapping and Normal maps with Rim Lighting.
First, what do I mean by "artwork pipeline"? Well, generally a pipeline is a process or set of tools that allow an asset or assets to be created within one program and imported into another for use. In this case all the pixel art is created in Aseprite and need to be imported into Unity3D. So the pipeline is all the editor code i've created in unity to automate as much of the importing process as possible.
Thanks to the amount of extension points within Unity and the openess of Aseprites file format documentation, creating a custom AssetImporter for Aseprite files was pretty straightforward. I'm in the process of open sourcing both my C# Aseprite file parser and my custom Aseprite AssetImporter for Unity, those should be ready for release soon.'
But back to the topic of emission maps. You might be asking what an emission map is and it may still not be entirely clear why aseprite is involved. Well don't worry! I'm going to explain all of this I promise.
Starting off, here's the end result: a frame capture from a test level where I'm reviewing some recent emission maps I worked on.
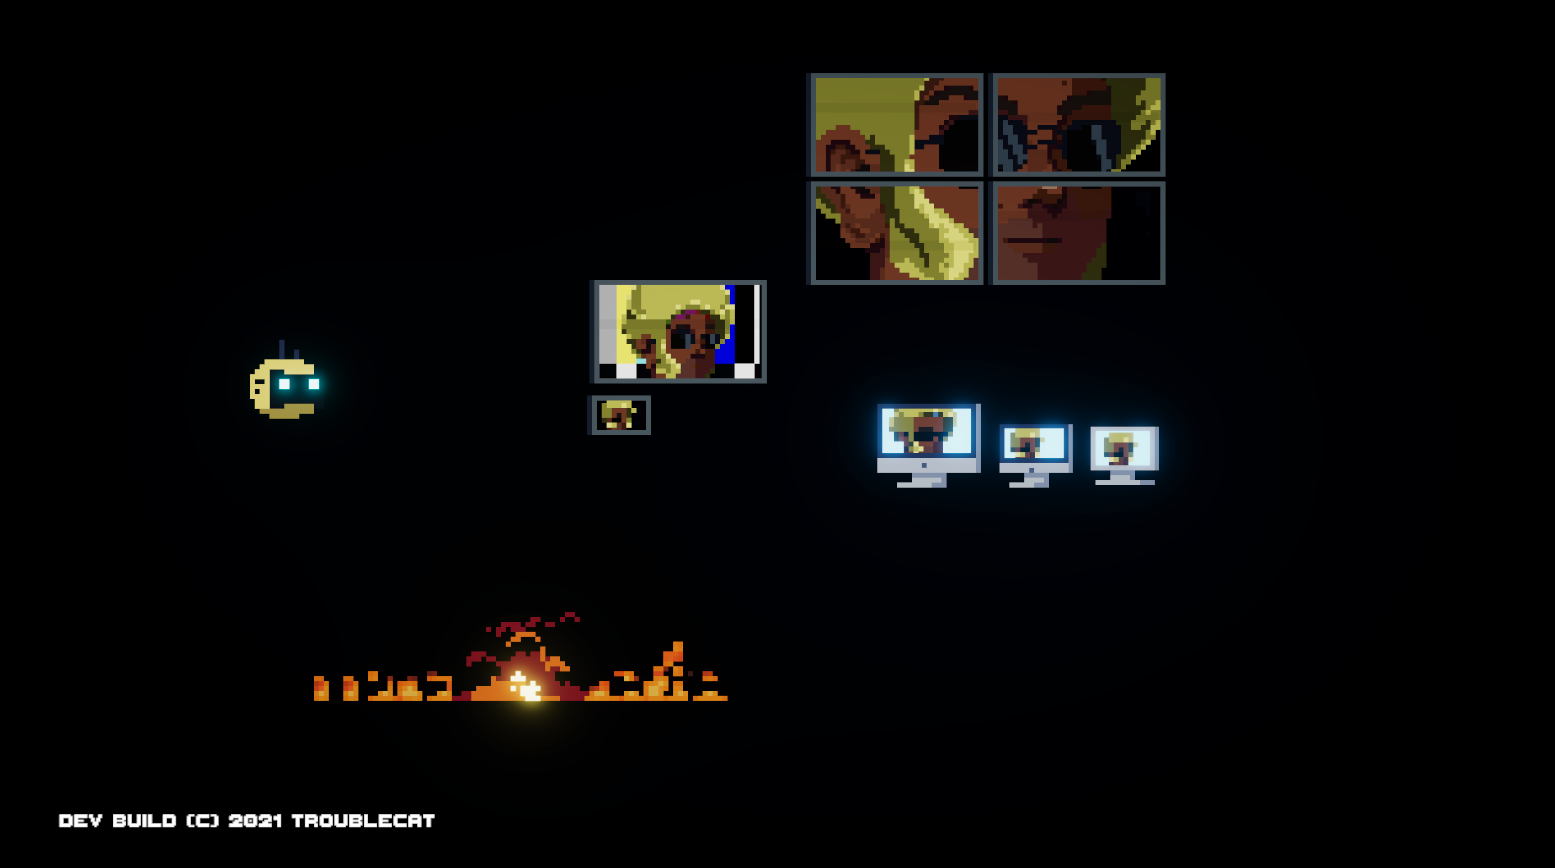
You can see how the fire, monitors and the eyes on Rook (the yellow robot on the left) all have a bloom effect where the color values are bleeding into the surrounding area and flaring the "lens" at their center. Basically they look like they are emitting actual light values directly at the camera, but they aren't. That's the gist of the effect. There isn't a single actual light source in the scene.
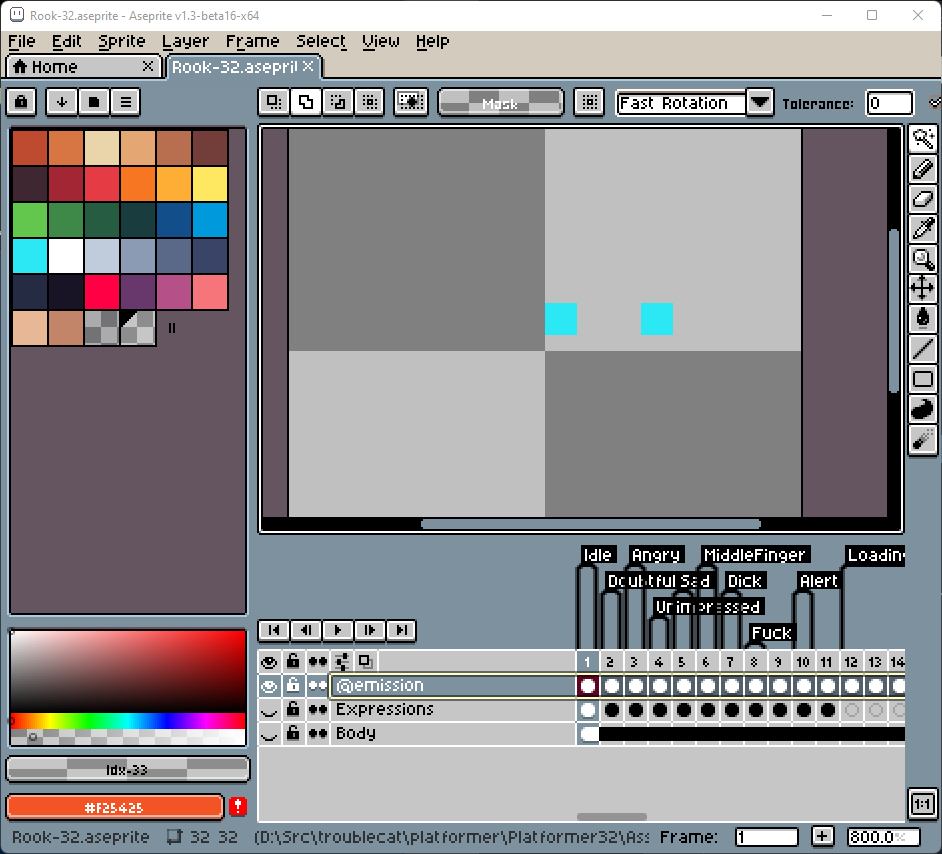
Let's take a look at Rook and see what data his Aseprite file has.
Ignore all the frames and tags in the timeline, but pay attention to the layers, of which we've got 3 here: Body, Expressions and @emission. The first two are probably pretty self-explanatory. The @emission one might seem a bit weird, what with that @ prefix and all. Let's single out that layer and see what's there. The @emission layer only contains two pixels for this frame and they match the color of Rooks eyes and are fully opaque. For giggles the RGBA of these pixels is RGBA(44, 232, 245, 255).
Ok, you're probably assuming that somehow this layer is getting pulled out and stored differently to create the bloom effect in the first screencap. It might even be detected because of that sus @ prefix. Well.... yeah. Yeah that's exactly right. My custom aseprite importer parses out the @emission layers as special texture data and stores them along with each of the frames within the sprite.
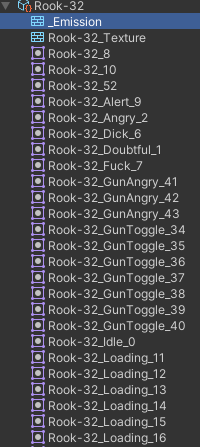
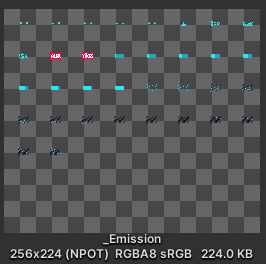
In the screenshot above you can see there is a texture named _Emission within the Rook-32 aseprite asset. This name is important so remember it, we'll come back to it in a minute. The texture data for _Emission is the raw pixel data from the @emission layer within the sprite, nothing else. There are a few of these special layers that the importer can handle: @normal, and @mask are the others but I'll get to those in a future post. I've included a really small but hopefully useful preview of the emission texture as it exists within unity below.
This next part requires a bit of inside-unity knowledge, so bare with me. During the asset import process there are more textures created than just the _Emission texture. Specifically there can be up to four: _Emission , _NormalMap, _MaskTex, and _MainTex. For this post we only care about _Emission and _MainTex. Each texture is stored as what's called a "secondary texture" within unity. Essentially, a bit of texture data that should be included each time the _MainTex is referenced. The names for all of these are important, like I mentioned before, because we can reference them using these names in any shader because they are imported as this special "secondary texture" type.
When you add a sprite to a SpriteRenderer within unity the bit of the sprite that is shown is actually a portion of the parent texture: _MainTex. The Sprite object contains the size and offset information that the shader uses to display the correct bit of the texture on the screen.
If you wrote a custom importer for Sprites that stored the texture under a different name the default unity sprite shaders wouldn't work.
But I digress, back to our current work on the bloom effect. When I attach any sprite from Rook-32 to a SpriteRenderer two pieces of texture data are implicitly available to any shader on the object: _MainTex the texture data with all of Rooks appearances and animations and _Emission the texture data that we see above. Again, this is because the textures are imported as "secondary textures", unity knows to implicitly pass them to the shader during execution.
With that information, I can add a property to my custom sprite shader to hold the given emission data:
_Emission("Emission Map", 2D) = "black" {}Then define a sampler
TEXTURE2D(_Emission);
SAMPLER(sampler_Emission);
After that I can sample the pixel data just like I would any other texture in my shader:
half4 em = SAMPLE_TEXTURE2D(_Emission, sampler_Emission, i.uv);For the uninitiated: i.uv is essentially the (x, y) coords of the pixel within the image data, however it's normalized between 0.0 and 1.0 across the width and height of the image. Not really important to what we're doing here, but worth a mention in case you hadn't seen it before.
ANYWAY, we're at the most important part of getting the feature to work: shifting the color value. The bloom filter i mentioned at the start is part of the Unity Post Processing pack and it works by applying that bloom effect to any color value above a certain threshold. My shader takes the emission map data and uses the color values to push the color data of the pixels in the matching positions beyond the normal color space - into HDR color space so that the bloom filter will be applied to them, without applying it to other color values within the scene.
Here's what that all looks like in the shader
half4 combined = CombinedShapeLightShared(c, mask, i.lightingUV);
combined += em * _EmissionIntensity;
combined.a = main.a;
return combined;
half4 is a type from the HLSL language, basically a 16-bit floating point number, not important. CombinedShapeLightShared() is a function that works with the Unity lighting system internals (including sprite lights) to apply light values to pixels, also not super important. The most important portion is where we add the emission color value em and multiply it by _EmissionIntensity. This is the part of the code that forces a color value into that "HDR" color space for the bloom filter to work.
_EmissionIntensity is an external variable that can be defined on each material within the Unity Editor or controlled via C# so I can tweak and tune emission intensity of individual objects/characters.
And that's it, really. Once that color value is set the bloom filter will take over and since the emission map shares the same dimensions as the main texture, all the sprite sizes and offsets will map correctly to it, ensuring that emissions can move/change during animations.
Until next time! You can always shoot me your thoughts on twitter.