Localizations in Unity: Part 1
📆 Created on August 15, 2021.From the start I wanted Electric Noir to be playable by as many people as possible. This has meant thinking upfront about certain problems that other game developers might save until later on in their projects.
Localization is one of those problems. Electric Noir is going to have a lot of dialogue, a lot of story which is to be expected if you know me - I tend to be a bit dramatic and I love to write, which means a lot of text is going to be present in Electric Noir. A lot of text.
Localization is one of those features that is way easier to build into your game at the start, rather than waiting around till the end so I started planning out my solution almost as soon as I created the Unity project for Electric Noir.
What do I even need to build??
I started by listing out the things that I would need to localize within the game, so that I could come up with a reasonable scope for the first version of this localization system.

After thinking hard for a few hours I came up with the following list of things within the game that I would like to be able to support translations for later on.
- Character & Narrative Dialogue
- Glossary Entries within the games codex (yeah the game is going to have a codex, ala Mass Effect)
- Interaction Prompts
- UI text
After I had this list of areas I wanted to support translation, next thing was to convert that into a list of requirements. The actual things I needed to build in order to make sure I can support all those areas I want.
- I should be able to bind a translation to a TextMeshPro object using a custom MonoBehaviour
- Translations should be easily importable into Unity
- Translations need to be stored somewhere I can easily give access to translators in the future
- I should be able to pull a translation at runtime via C# code
- I should be able to store a translation on any GameObject using a custom class and inspector type
- The current selected language should be accessible at any point in the game code
Alright, that's admittedly a lot of stuff to build and I didn't make all of these features at the same time. I started with the bare minimum to get me a good foundation to continue off of later on. I decided that the localization import and storing a translation on a GameObject were the two tasks best to start on. These would give me a pretty solid foundation to stand up other feature on later and they would cover a decent amount of the problem space.
Setting up Localizations
I created a Google Spreadsheet to store the localization entries, this allows me to give translators access to the sheet later on without needing them to deal with GitHub or game source code. Here is what the spreadsheet looks like.
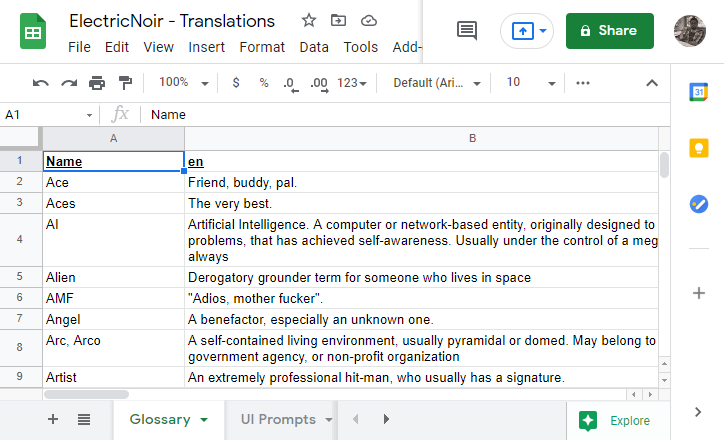
It has multiple sheets, which allow me to group translations by function or area of the game (you can see I have Glossary and UI Prompts currently). Each sheet has multiple columns:
- Name: the word or phrase that is translated
- en: the english version of the translation (also called the root translation)
- es: the spanish version of the translation
- de: the german version of the translation
Other languages can be added by adding a new column with that languages two character language code. I chose spanish and german as the other two test languages to have other languages to switch to and to test out text resizing, as German is considered a very lengthy written language.
There is data for each of these languages, provided automatically via Google Translate. This was super easy to hook up given that Goole Sheets has a GOOGLETRANSLATE() function you can use within your cells. I've included the formula I used below. It passes the english translation, the english language code and then the desired language code (both of which are just the column header values). Using this formula you can copy paste this to every cell in your sheet and boom! you have translations.
=GOOGLETRANSLATE(B2, B$1, C$1)
These translations will absolutely not be good enough for you to use in your final game. I plan on hiring native speakers in the languages I target at release to populate this sheet, however these values will be perfectly suited for testing out the rest of this localization feature.
Now, when I want to import a translation I download an export of the specific sheet in Comma Separated Values (CSV) format and move that into my project.
That wraps up part 1, in the next post I'll take you through converting the CSV file into a useable asset within Unity.
Until next time! You can always shoot me your thoughts on twitter.